We’re so excited to be back over at Design Dazzle for Summer Camp again this year! This time we’re thinking outside the box by creating these brightly colored bowls from Perler beads (also called hama beads). They are so simple that even the littlest hands can help make these fun catch-alls (though all kiddos will need a parent’s help with the oven!).
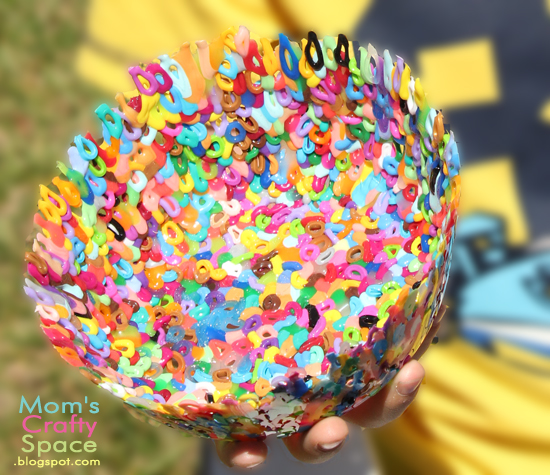
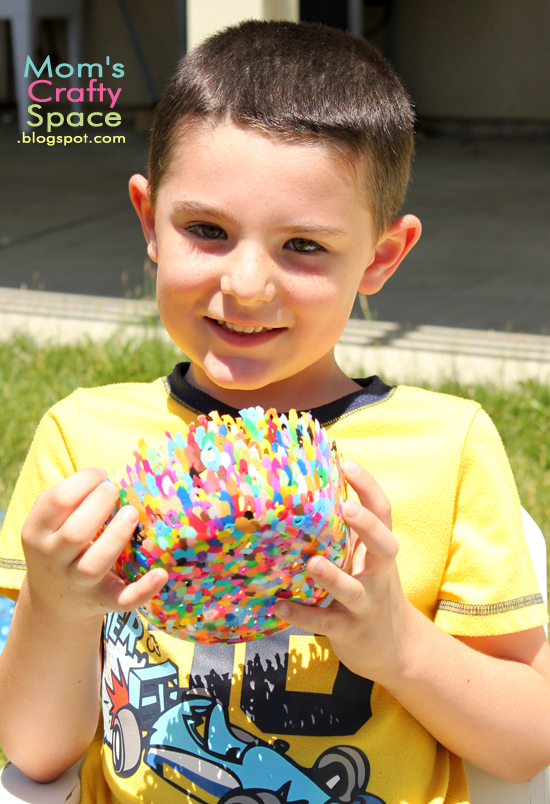
These bright and cheery bowls are perfect for storing all of your small trinkets and treasures (my guys like to put Legos and special rocks in theirs), and they make a special gift for friends and grandparents.
Perler Bead Bowls
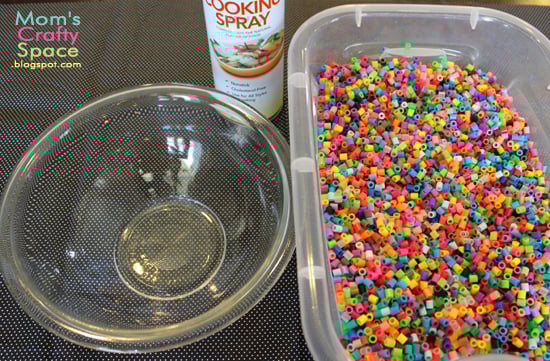
All you need is an oven-safe bowl, perler beads, cooking spray and an oven that has been pre-heated to 375 degrees.
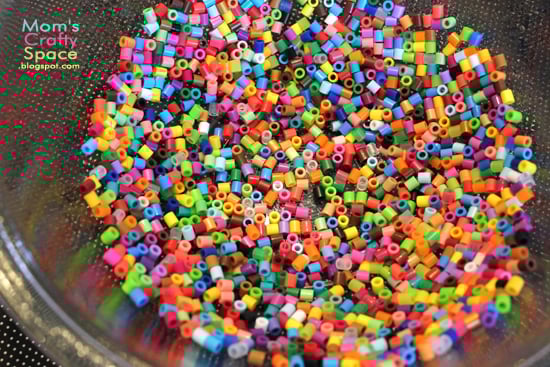
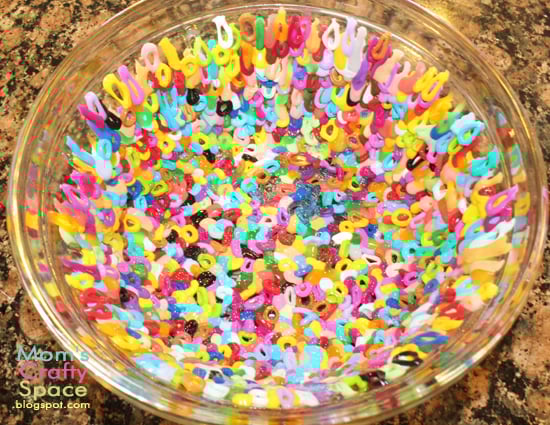
Lightly spray the inside of your bowl with cooking spray, and pour in a handful of perler beads. Gently push the beads around so that there is only a single layer of beads covering the bottom of the bowl. The cooking spray will help the unmelted beads temporarily stick to the walls of the bowl in order to build it up and make it taller.
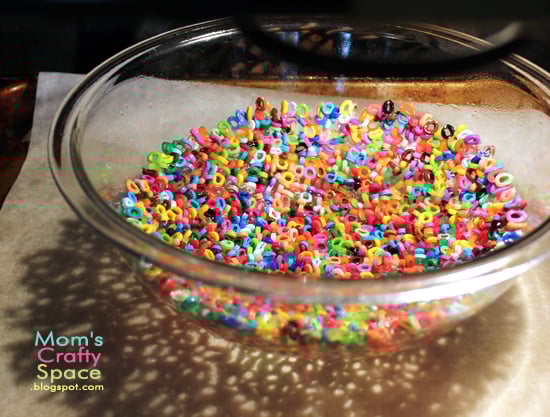
Place your bowl on a baking sheet and into your oven. After about 5 minutes you’ll see the beads start to stretch out and begin to melt.
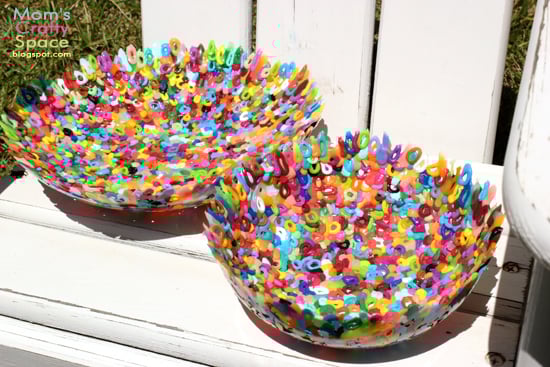
After 15-20 minutes the bowl will be fully melted and can be removed from the oven. Please, be careful because the bowl will remain hot for quite awhile after it’s removed from the oven! At this point while the melty beads are still flexible, you can use the back of a spoon to gently push the softened beads around and fill in any large holes or gaps.
Allow to cool for 20-30 minutes before removing the bead bowl from the outer bowl! Give the outside of your bead bowl a light wiping with a soapy sponge to remove any cooking spray residue.
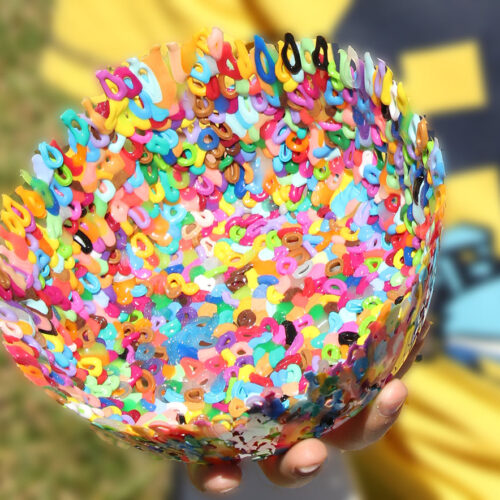
These fun bowls are textured on the inside and perfectly smooth on the outside. I love the way the top row of beads melt and slide down to create unique teardrop shapes – lovely! Try making them with different colored bead combinations (I think red, white and blue would be fantastic for 4th of July!) and by using a variety of different sized and shaped bowls. There are so many exciting possibilities!
- 1-2 cups Perler Beads
- 1 Oven Safe Bowl
- 1 Cooking Spray
Preheat oven to 375 degrees.
Lightly spray the inside of your bowl with cooking spray.
Pour in a handful of perler Beads. Gently push the beads around so that there is only a single layer of beads covering the bottom of the bowl.
Place your bowl on a baking sheet and into your oven.
After 15-20 minutes the bowl will be fully melted and can be removed from the oven.
Heidi Kundin( Owner & Creative Director )
Heidi Kundin has captivated the hearts of millions with her colorful and inspiring approach to crafting, celebrations, and family fun. With over 15 years of experience, Happiness is Homemade has become a must-visit destination for those seeking quick and easy creative ideas and last-minute solutions. Heidi’s warm personality shines through her posts, inviting readers to join her on a creative journey that’s fun, rewarding, and achievable. Heidi is also the author of Homemade Bath Bombs & More and DIY Tie-Dye.