
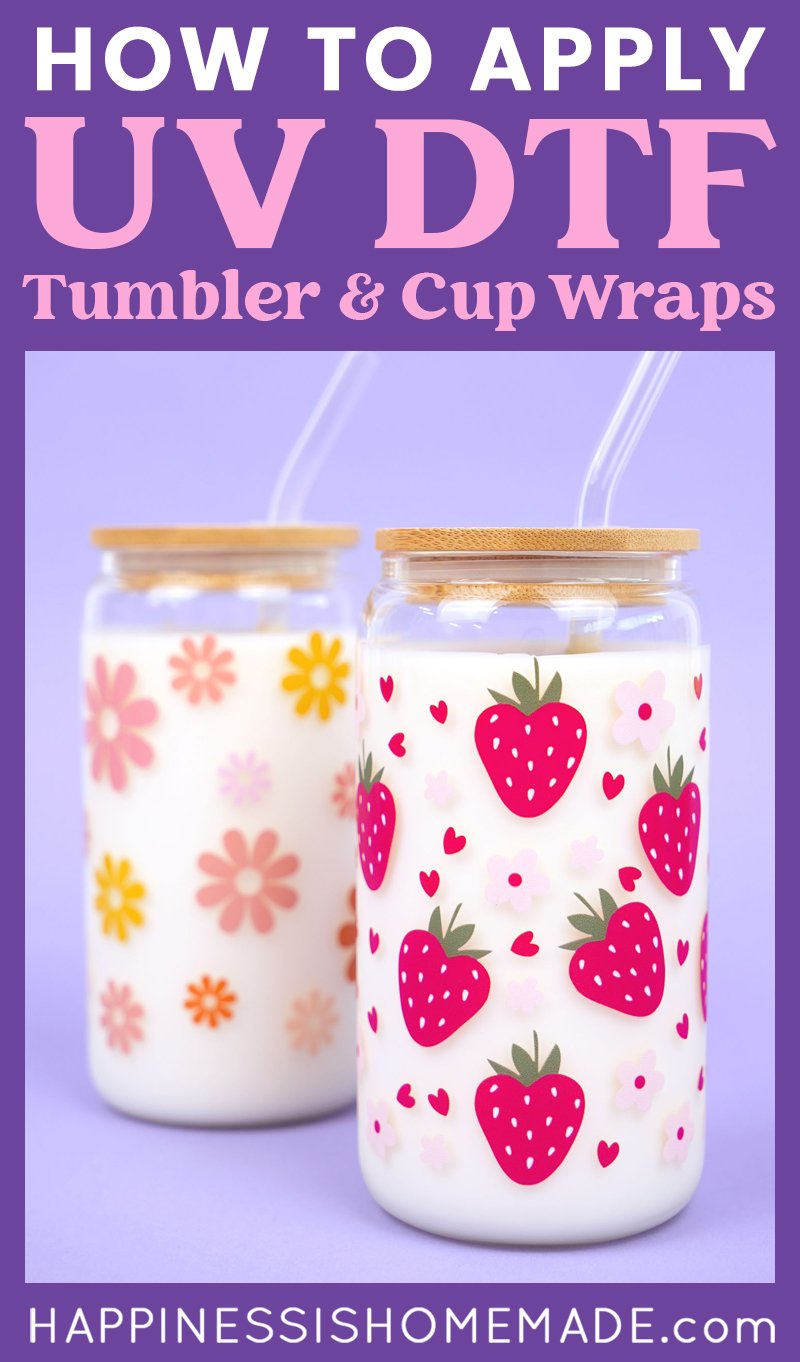
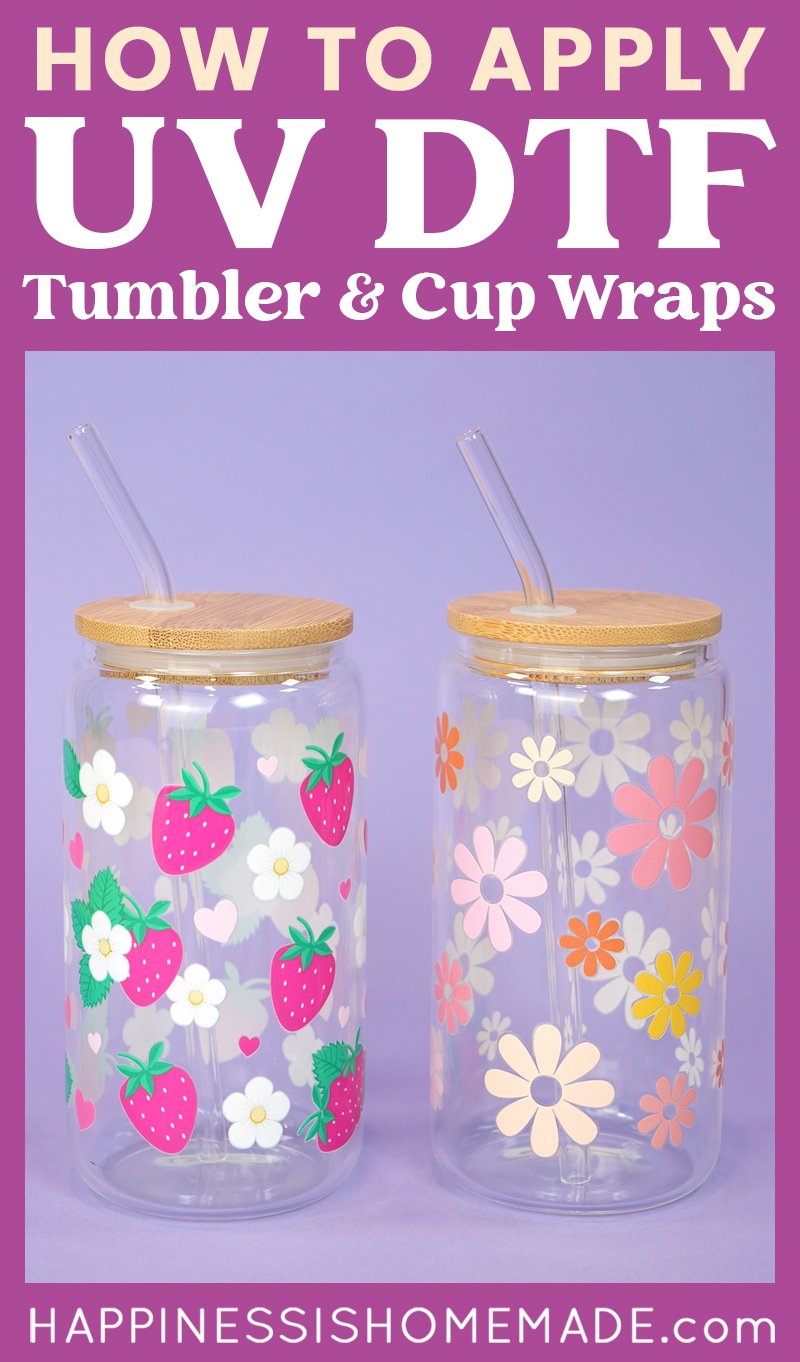
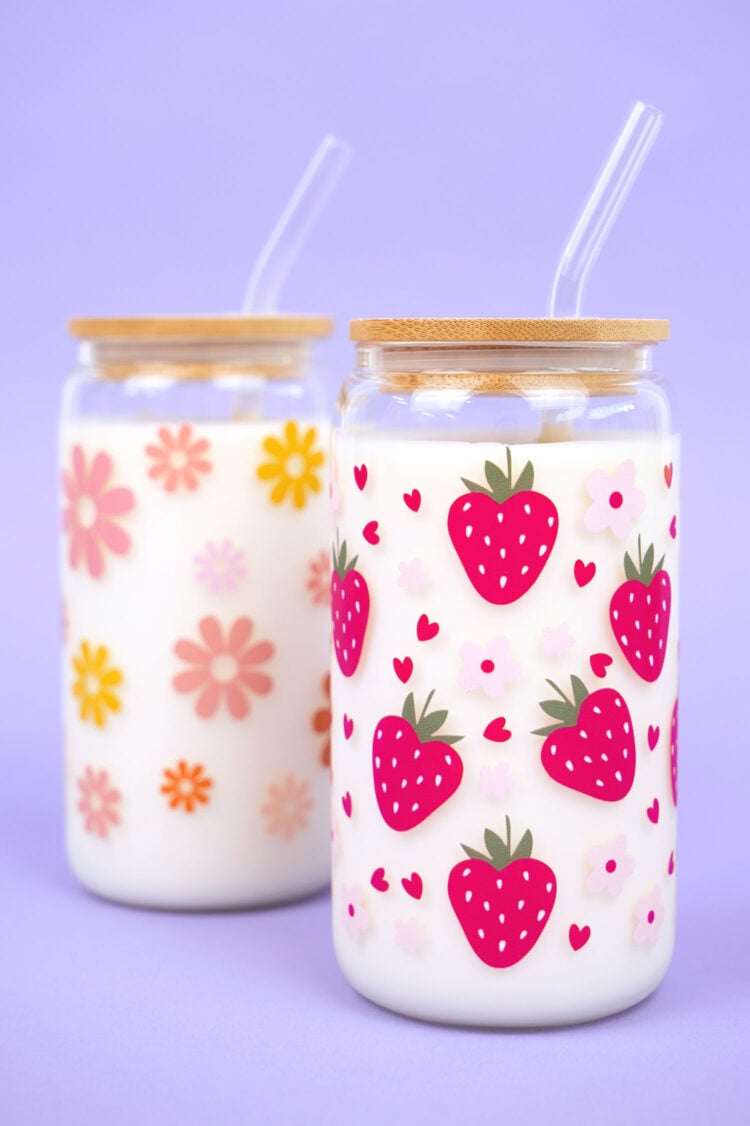
Learn how to apply UV DTF cup wraps to tumblers, mugs, and more! UV DTF wraps are fun and super easy to use – great for beginners!
Skill Level: Beginner – UV DTF cup wraps are easy-to-use and great for beginners!
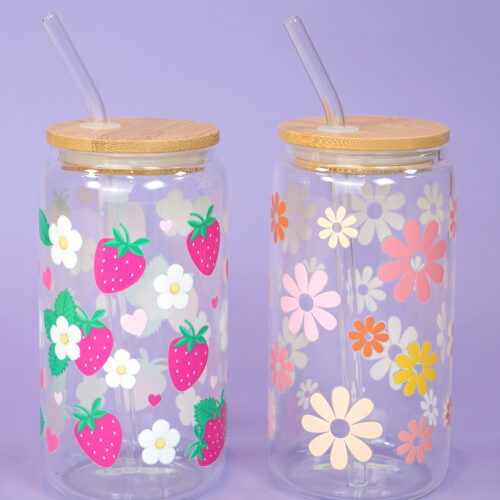
Have you tried crafting with UV DTF cup wraps yet? They are SO fun and simple to use, and they produce professional-quality results with minimal effort!
The other day, I showed you how to design UV DTF cup wraps using our FREE gang sheet templates. Today, I’m going to show you how to take those cup wraps and apply them to tumblers, mugs, and more!
Why You’ll Love Using UV DTF
Quick & Easy: These fun cups can be made in under 5 minutes!
Cost-Effective: No need to buy multiple colors of vinyl – get detailed multicolored designs all in one single UV DTF layer!
No Special Equipment or Tools Required: All you really need is your UV DTF transfer, a scraper tool, and a cup!
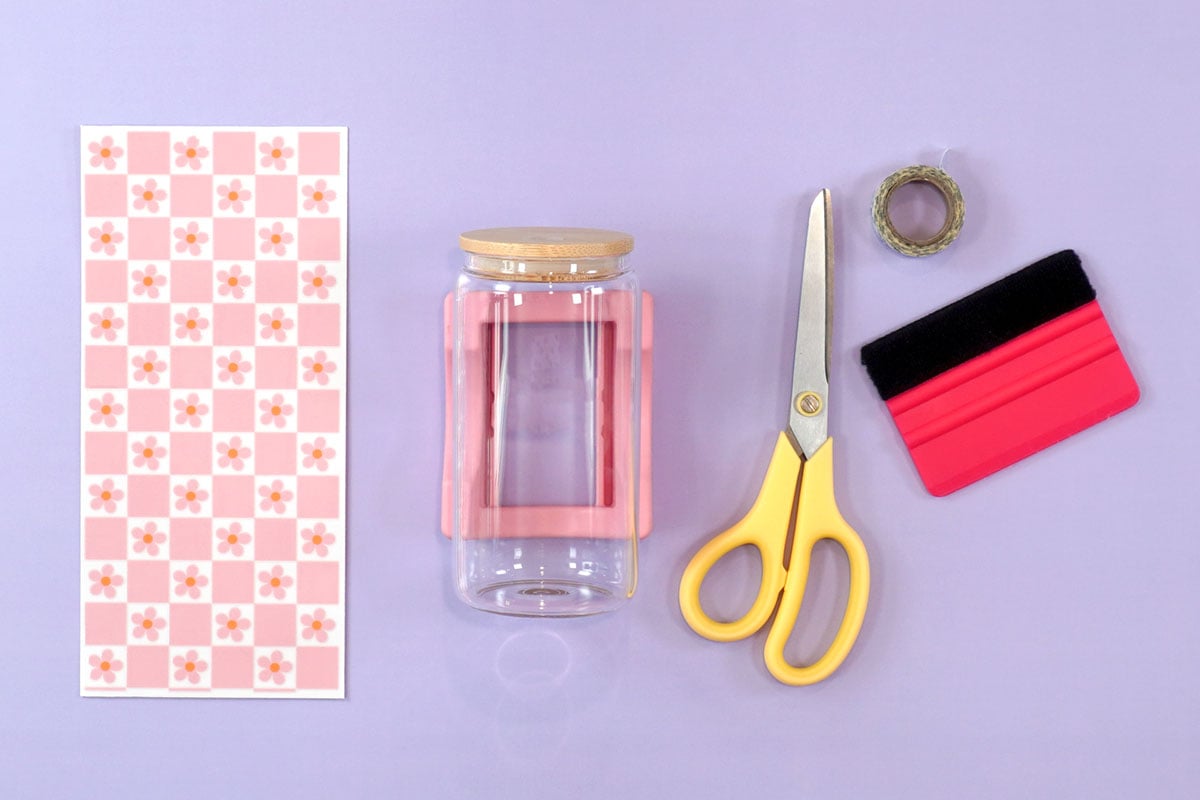
UV DTV Cup Wrap Supplies
* When ordering your UV DTF transfers, please be aware that quality definitely matters and can affect the ease of use of the transfer. I always purchase my UV DTF cup wraps from Ninja Transfers because I find their colors and quality to be superior to other brands that I have tried.
Related Side Note: when purchasing pre-printed UV DTF transfers, look for sellers who have a reputation for high-quality. Inexpensive wraps from places like Temu and Shein (and even some Amazon sellers) are made from thinner material that have been known to tear and rip MUCH easier than high-quality transfers will!
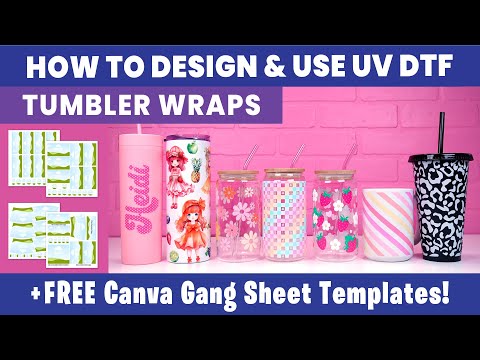
Video Tutorial
If you prefer to watch video tutorials, click the video above to learn how to design, order, and apply UV DTF cup wraps!
[Jump ahead to the 13:45 mark for the details on how to apply the cup wraps!]
How to Apply UV DTF Cup Wraps
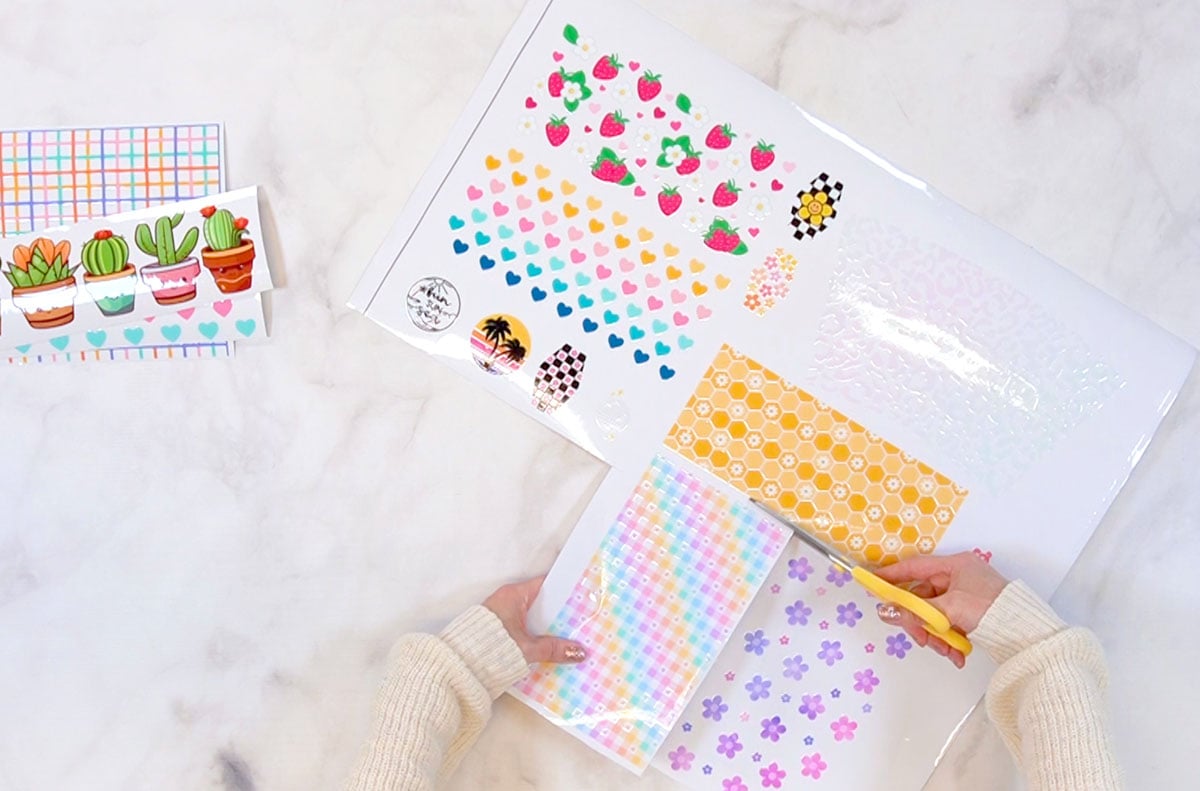
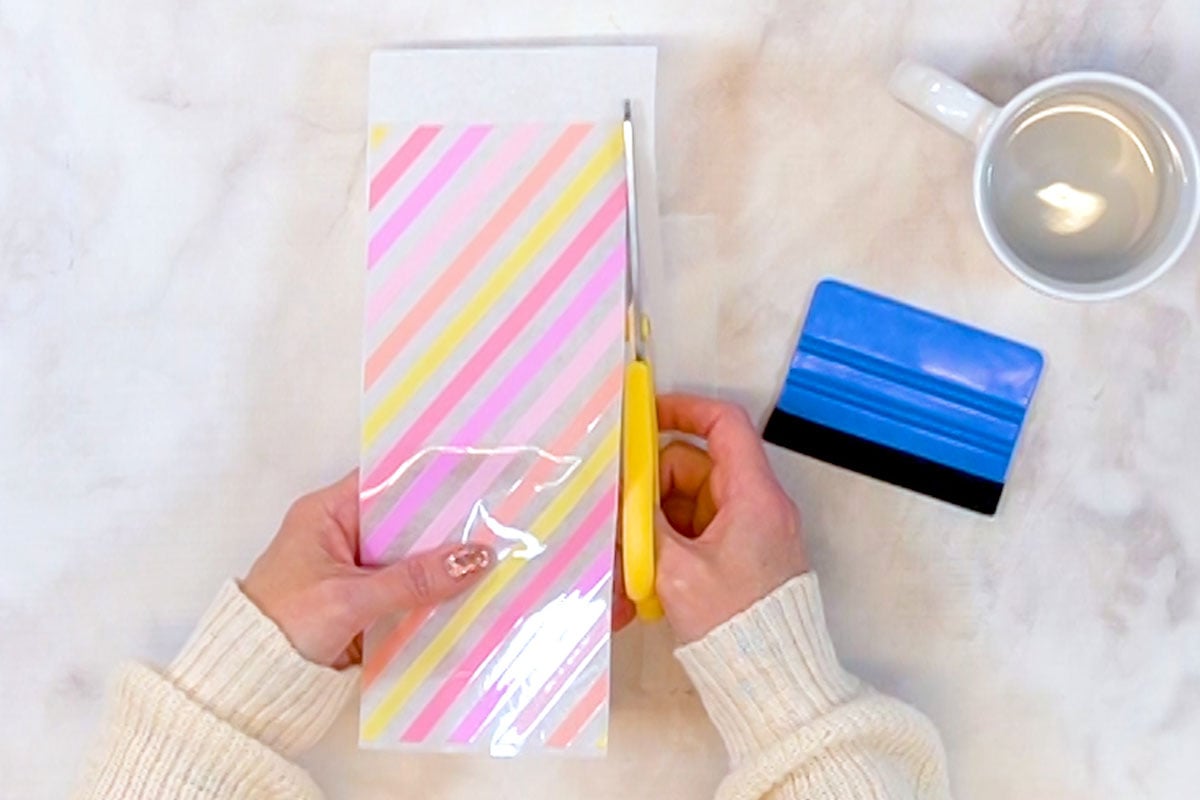
To begin, if you have ordered your UV DTF cup wraps as a large gang sheet, you will want to cut them down to size into individual transfers. Be sure to cut close to the edges of the design so that there is not a lot of excess.
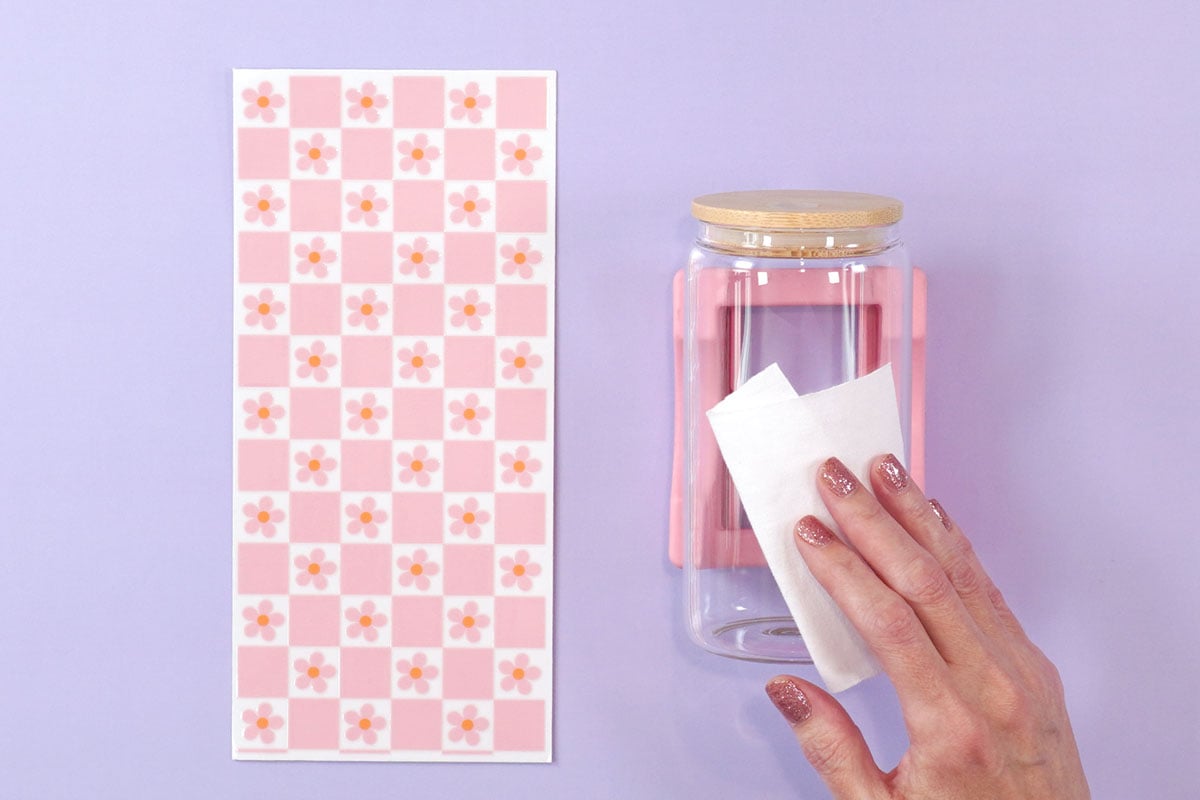
Before applying the UV DTV cup wrap, you will want to first prep and clean your cup to make sure that it is completely free of any oils, dust, lint, or debris.
Many people recommend that you clean your cups with isopropyl alcohol, but others warn that using alcohol with UV DTF can break down the adhesive and lead to cracking. I personally like to err on the side of caution, so I only use a lint-free cloth to clean my cups and glasses.
Once the cup is clean, it’s time to apply your UV DTF cup wrap.
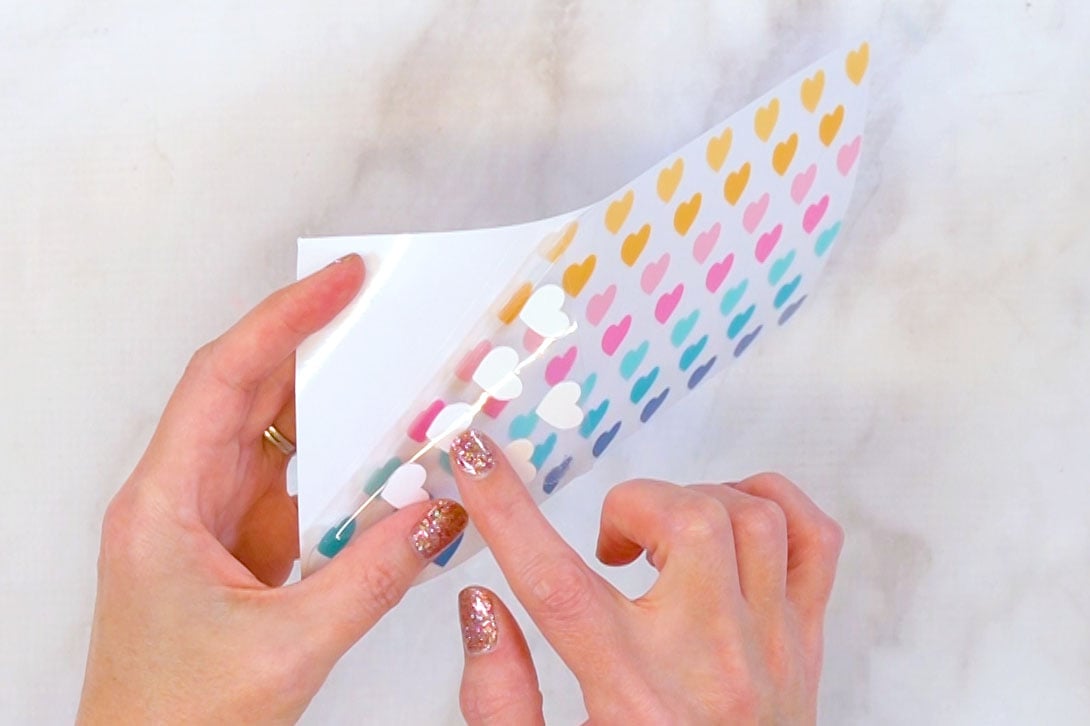
A UV DTF Transfer is made up of three layers – a backing layer (can be white or clear depending on the manufacturer), the UV DTF print layer, and a clear top sheet that acts as a transfer tape. If you have ever worked with adhesive vinyl and transfer tape, it is very similar in concept.
If you’re super confident in your ability to keep things lined up properly, you can dive right in to applying the cup wrap – simply peel off the backing and place the transfer on to the cup!
Personally, I am NOT so confident in my lining-up abilities 😂, so I use the following technique when applying UV DTF cup wraps:
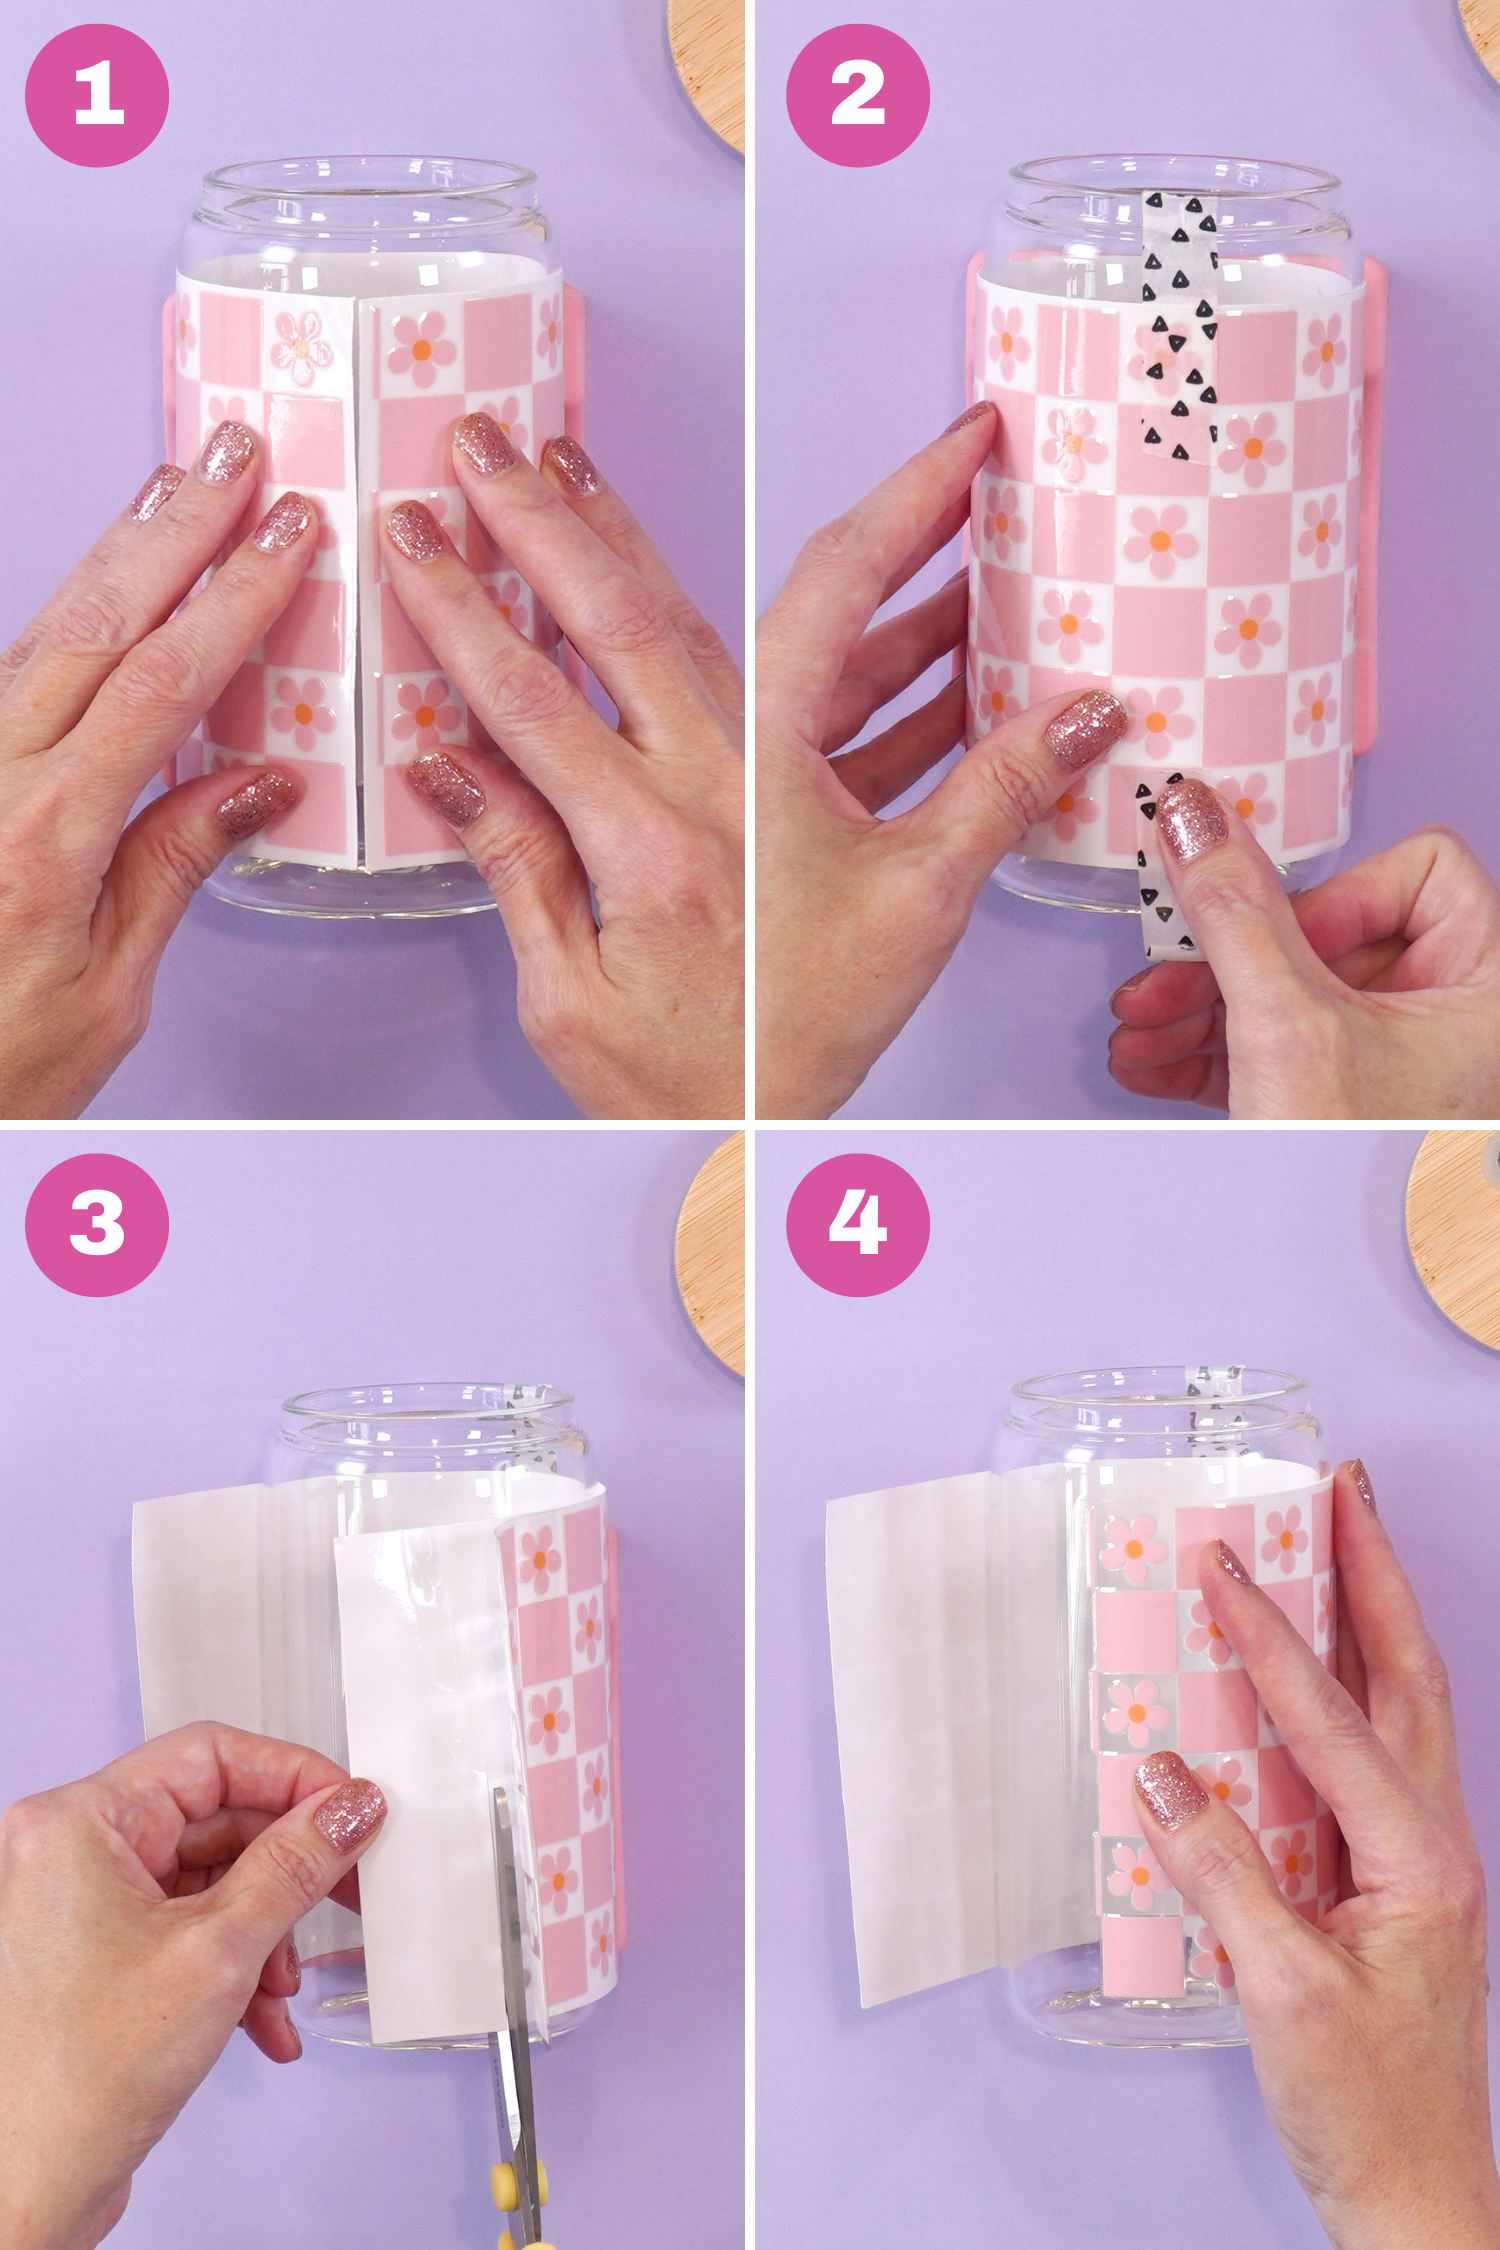
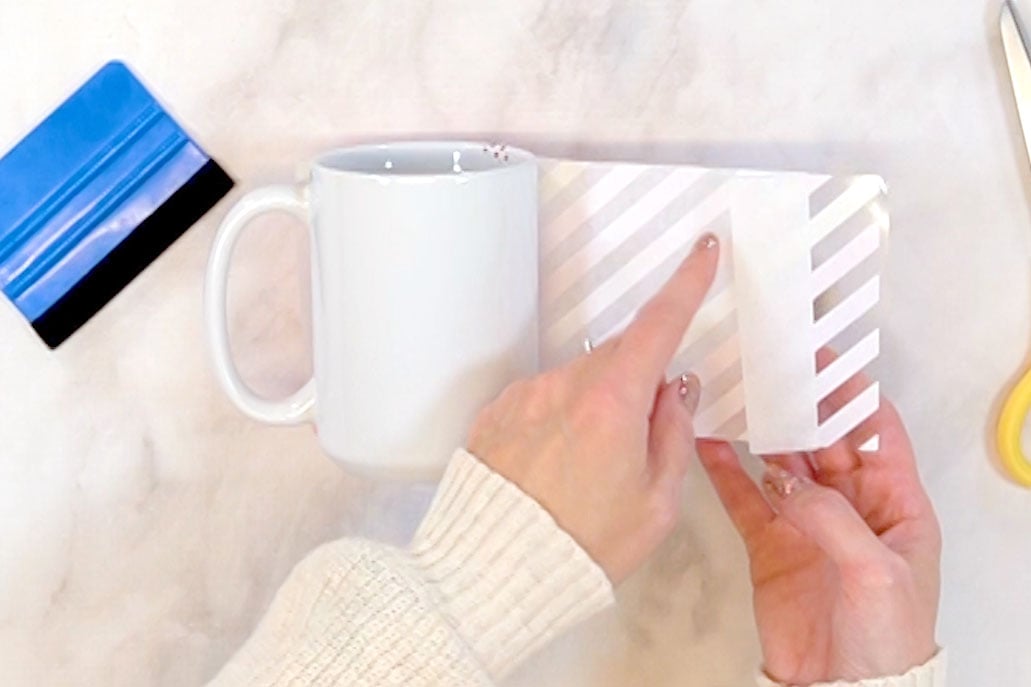
- Step 1: Start by wrapping the transfer (with the backing still on!) around the cup to determine the proper placement.
- Step 2: Then, use two strips of washi tape in the middle of the transfer to hold it in place.
- Step 3: Peel away about an inch or two of the backing, and use your scissors to cut away that section of backing.
- Step 4: Using the washi tape in the center like a hinge, carefully lay down the exposed section of the cup wrap, and use your fingers to press and smooth the design onto the cup.
- Step 5: Remove the washi tape pieces. Slowly peel back the backing to expose more of the cup wrap, and use your fingers to smooth down the design and adhere it to the cup as you go along.
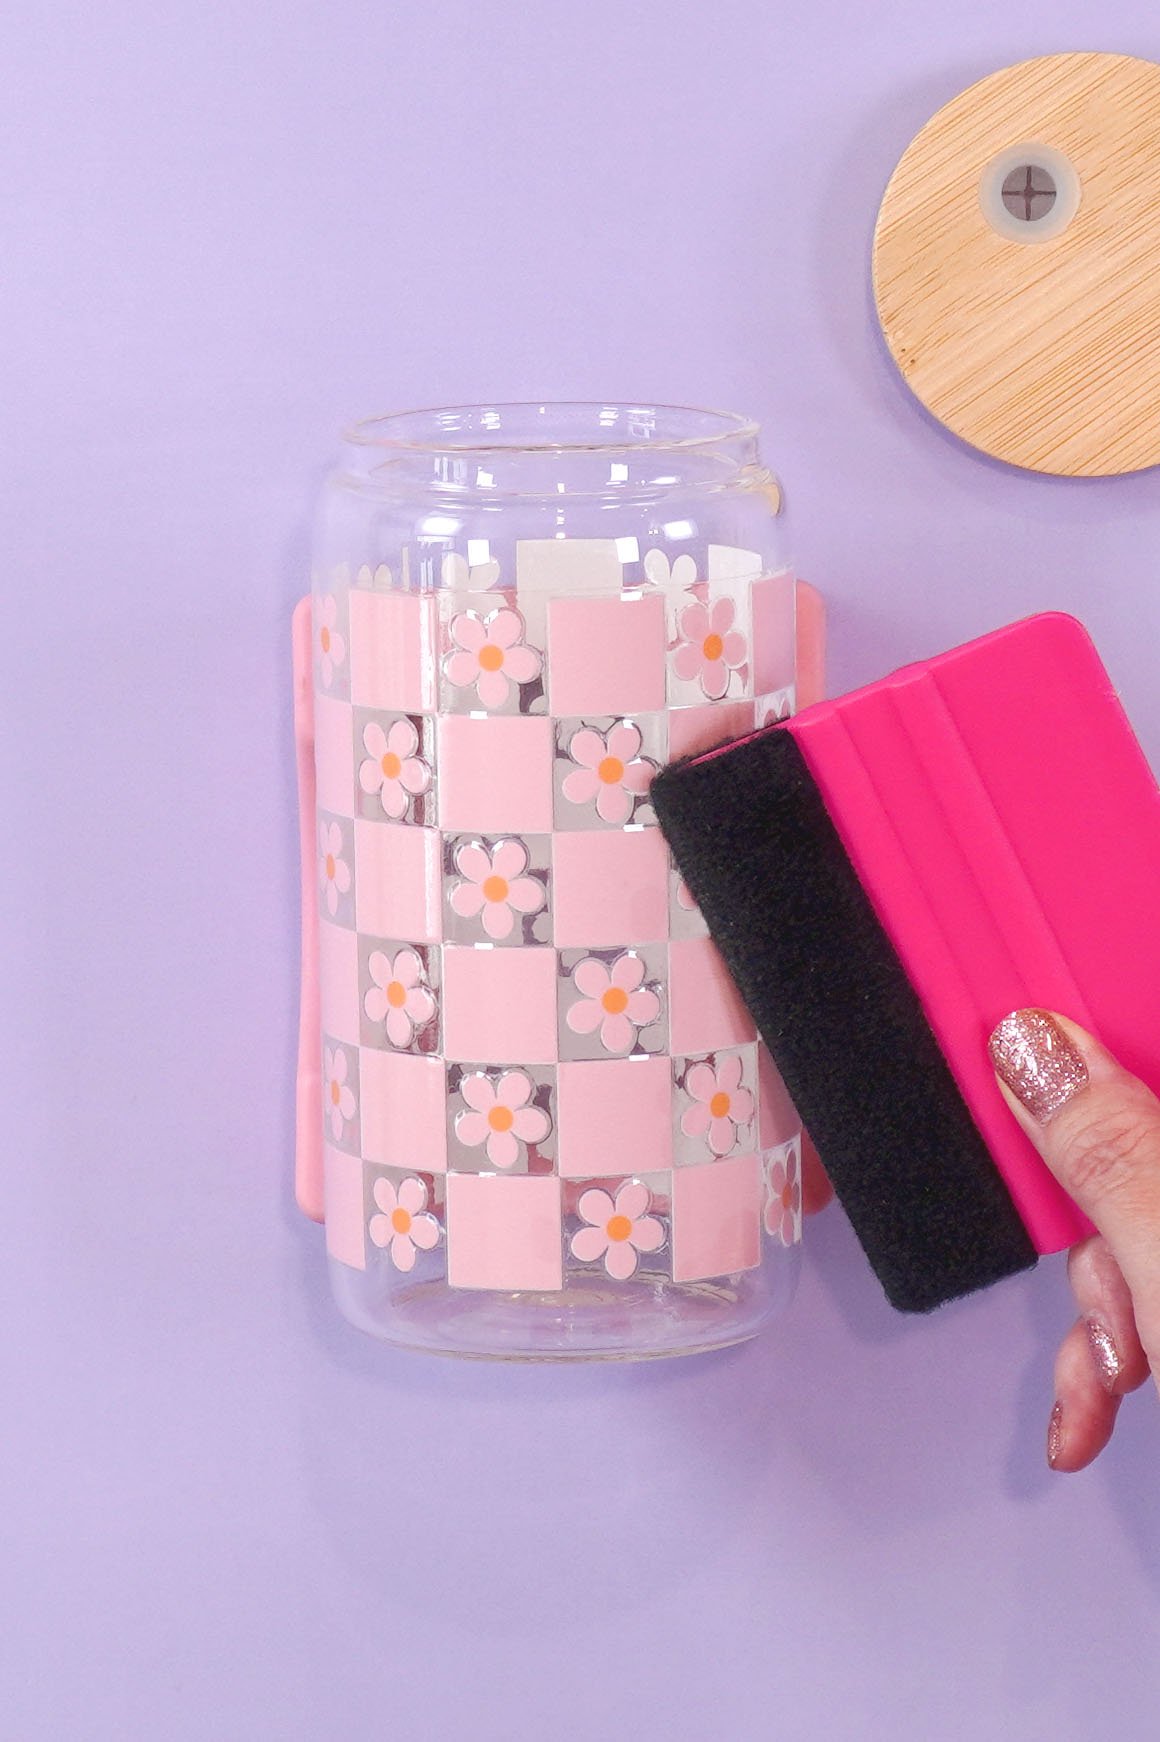
- Step 6: Use the felt end of a scraper tool to gently burnish the design and make sure that it is firmly adhered to your drinkware with no air bubbles trapped underneath.
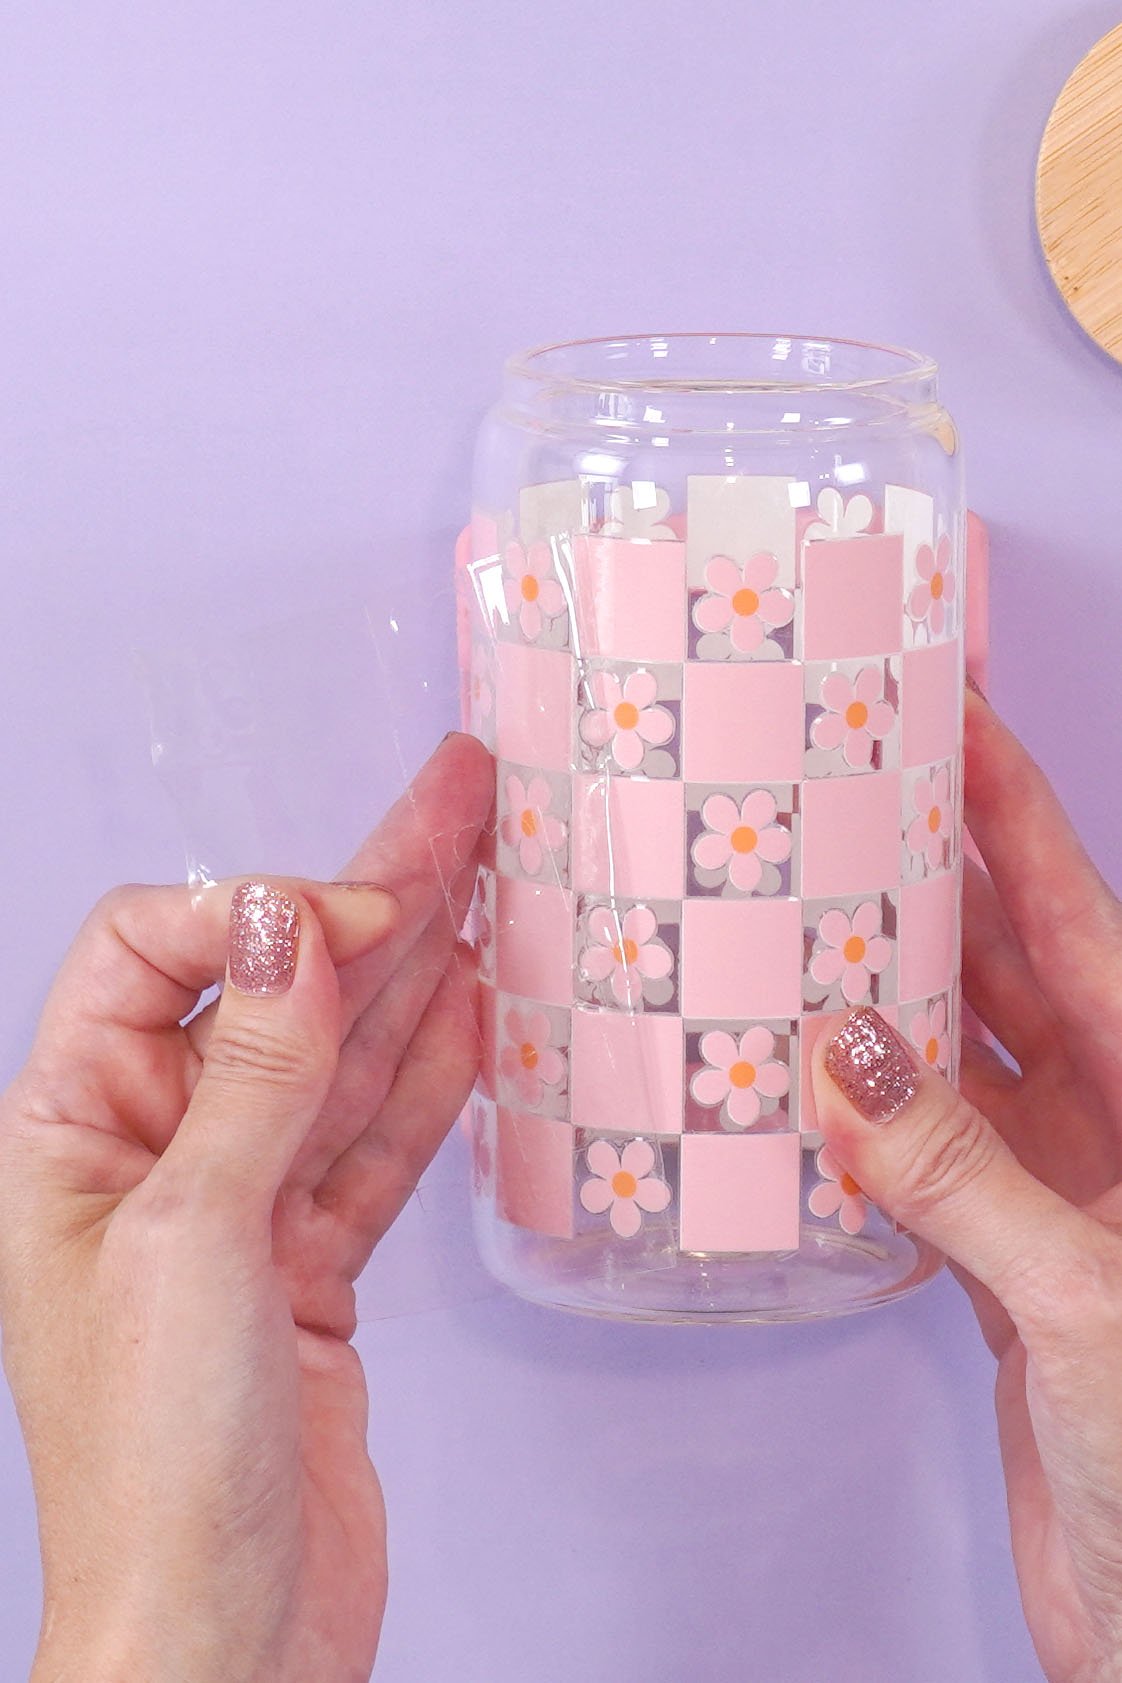
- Step 7: Carefully peel off the transfer tape layer. If any of the UV DTF design starts to lift up along with the plastic, gently place it back down and burnish it again with the scraper before slowly attempting to remove the plastic again.
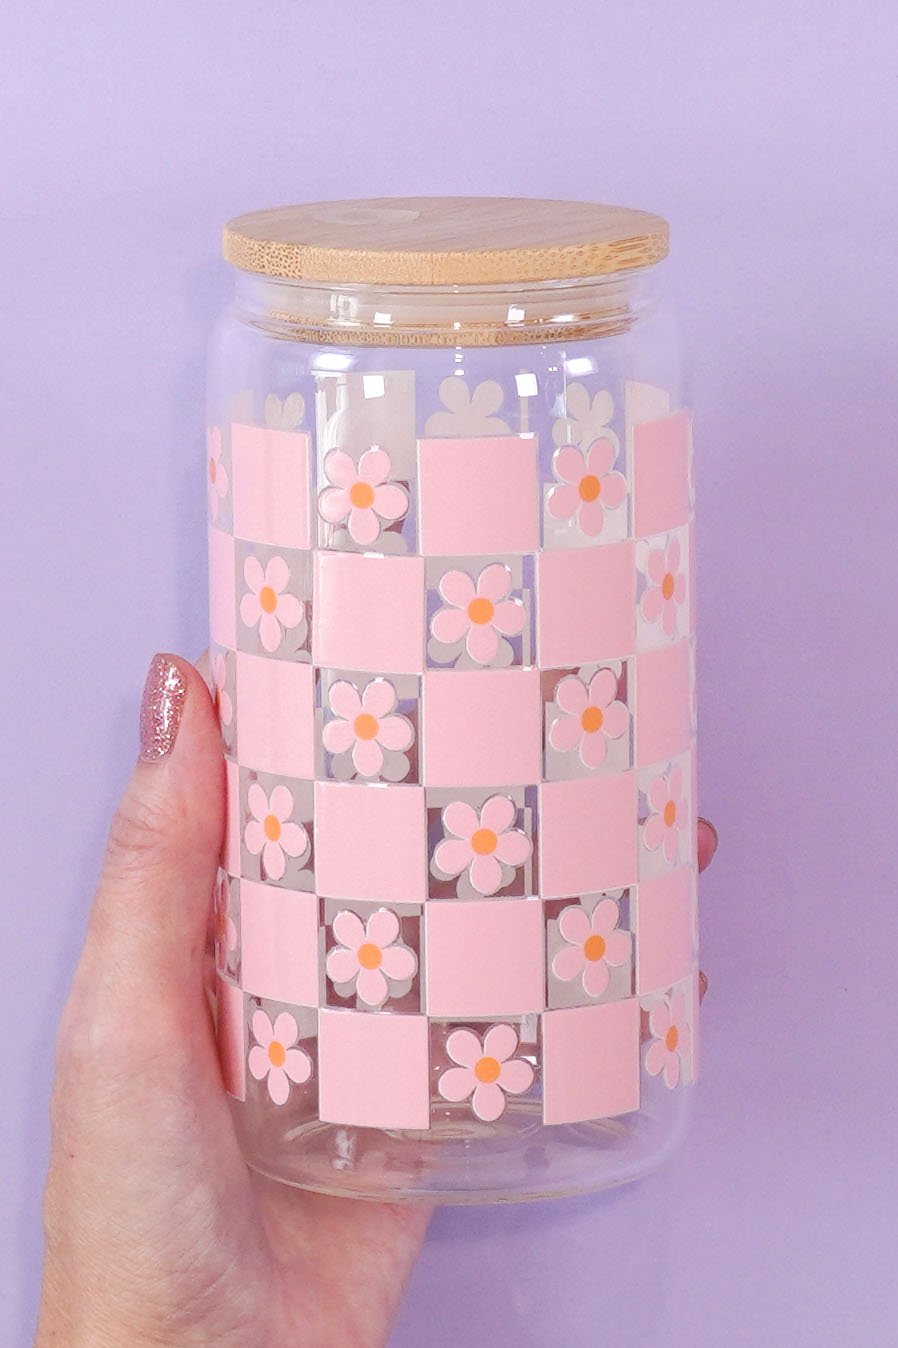
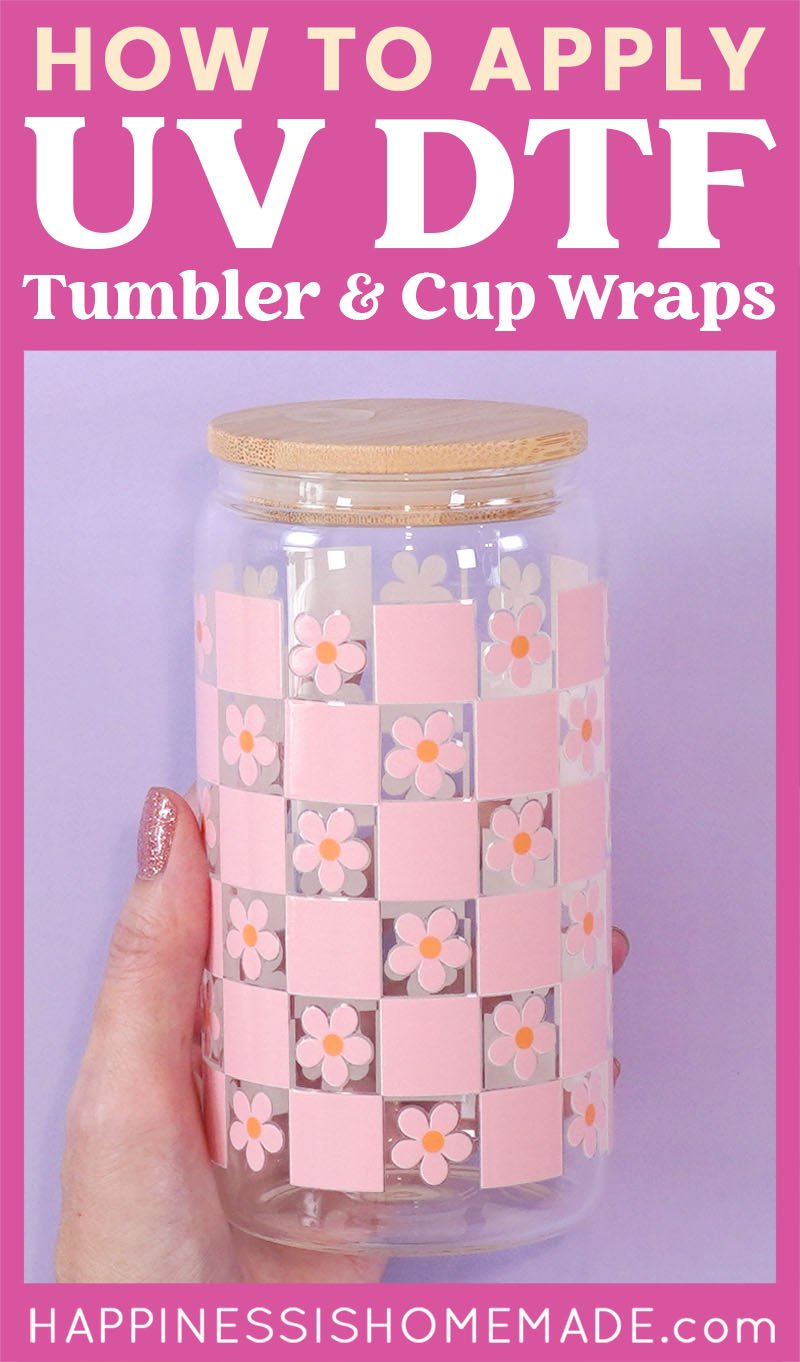
This adorable checkered cup turned out SO cute, and it was super quick and easy to make! 😍
Heidi’s Pro Tip!
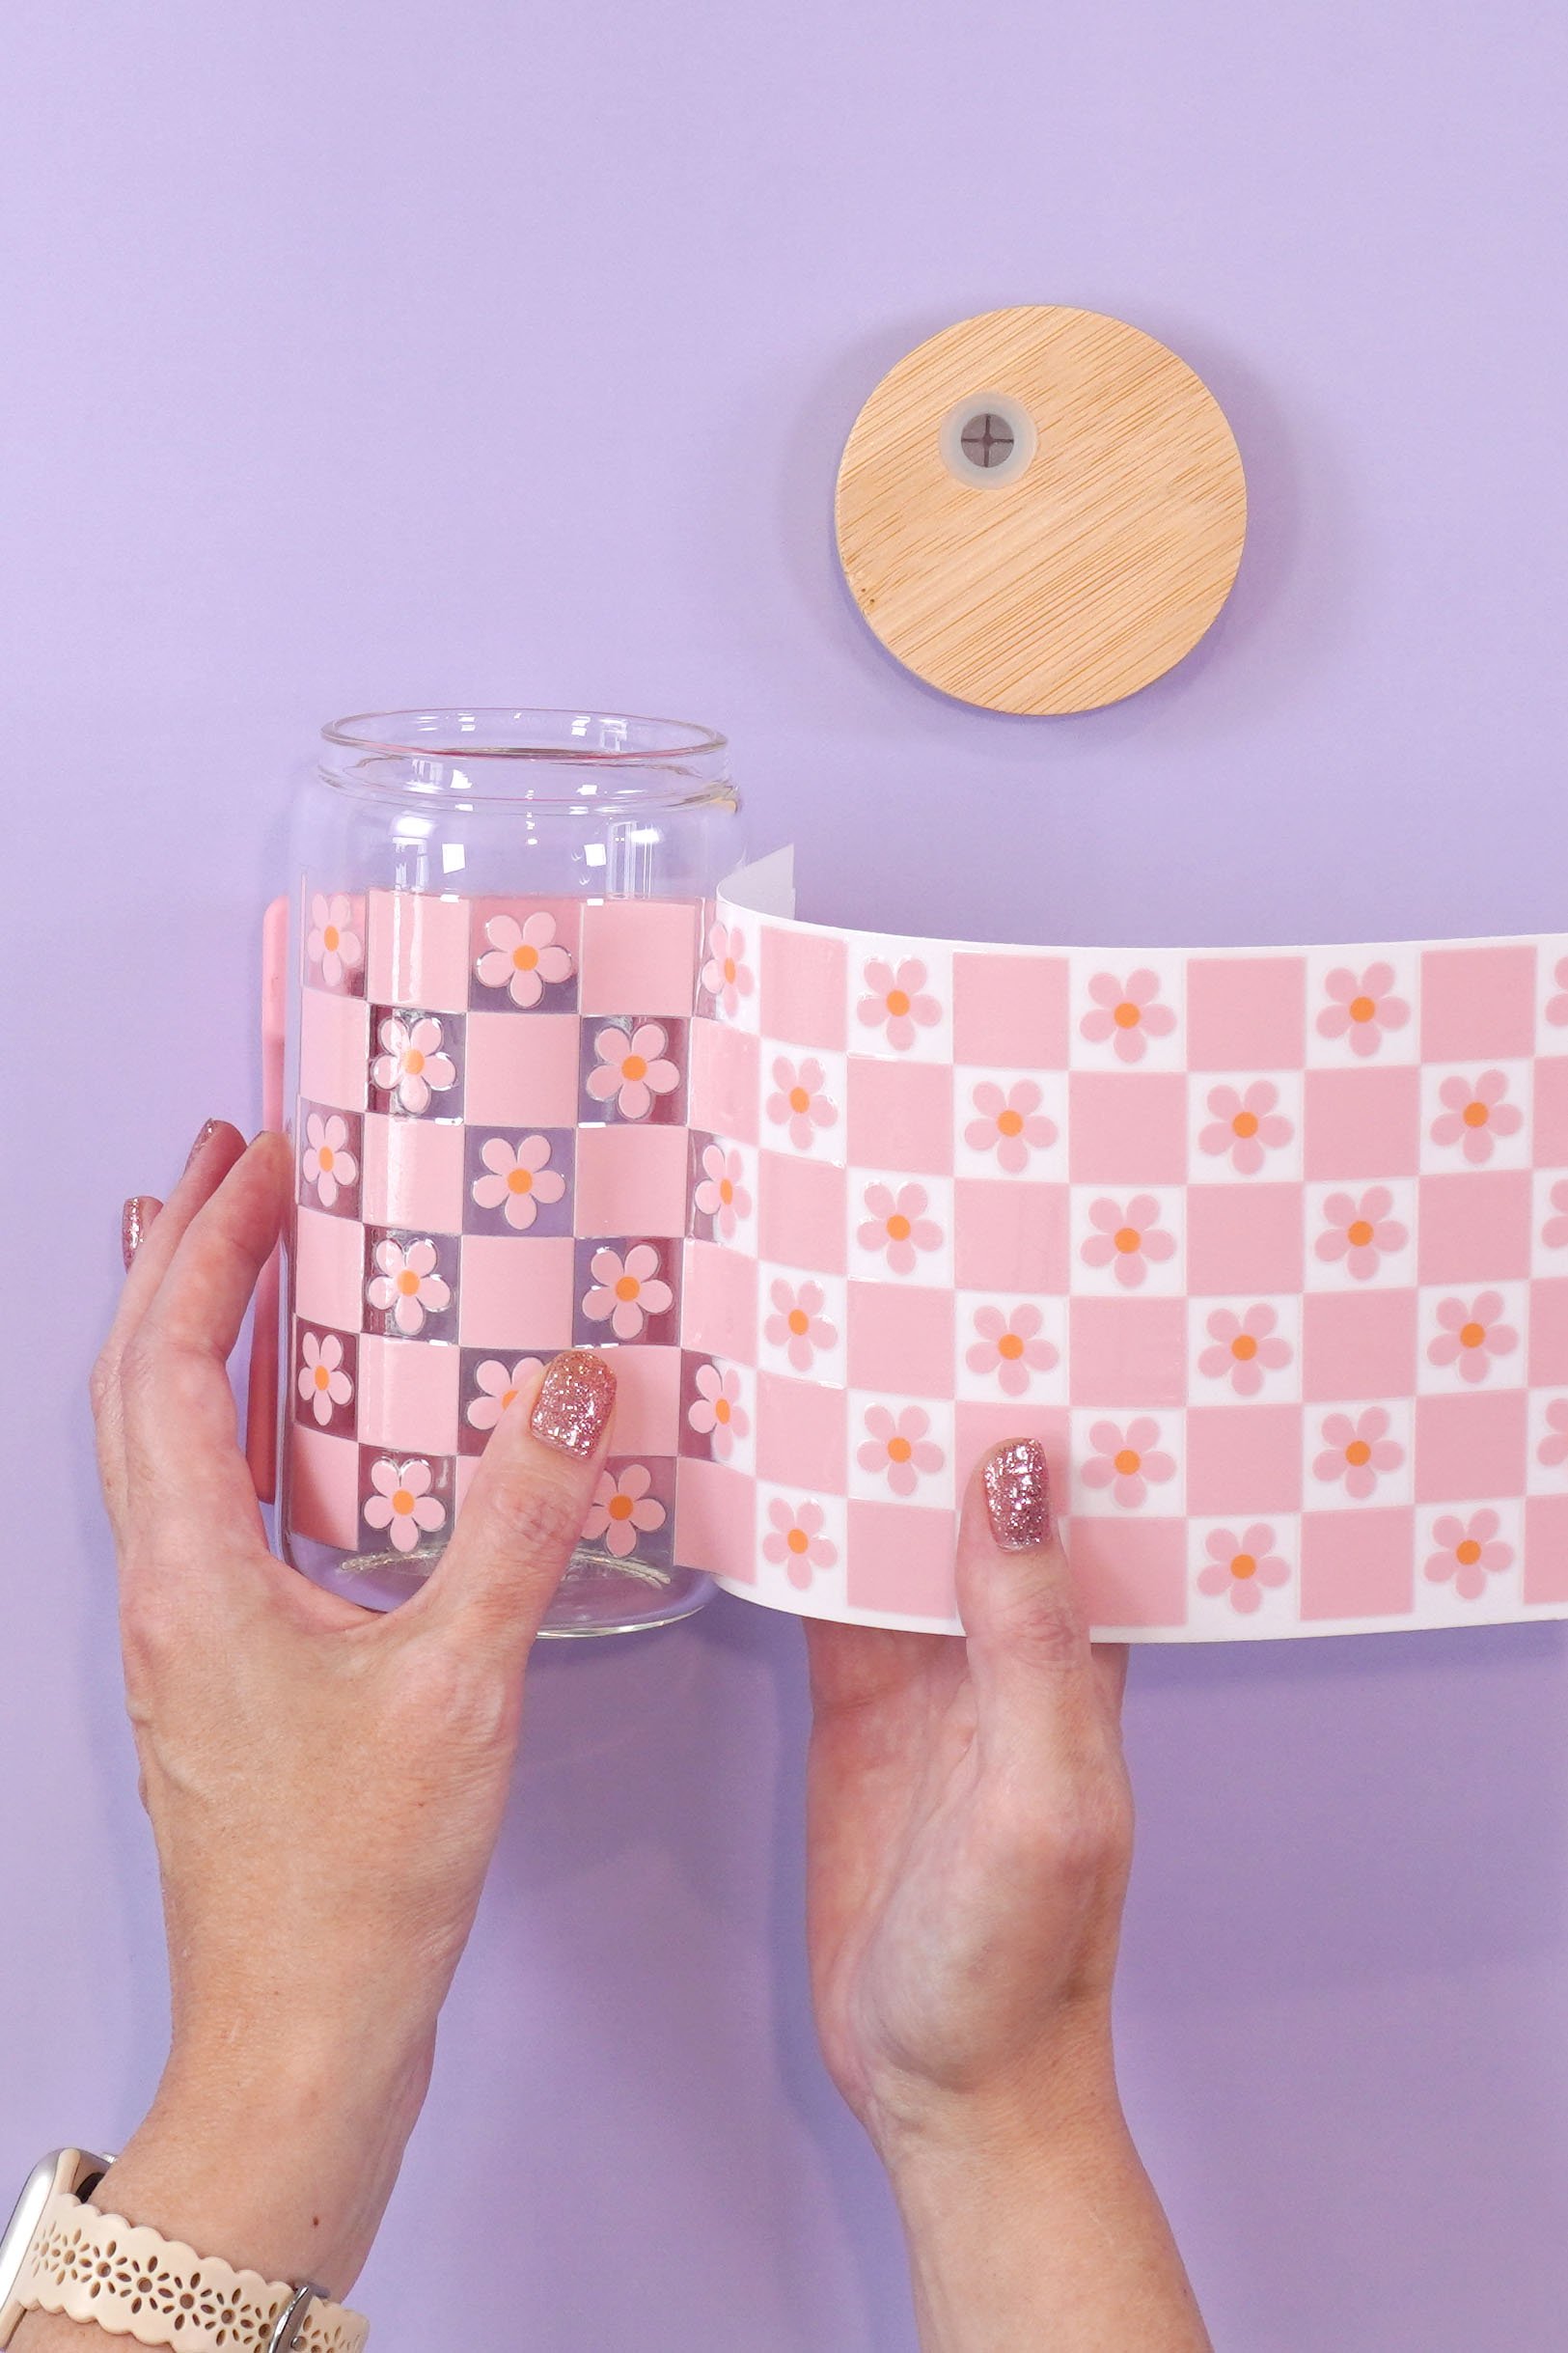
If your UV DTF transfer has extra thick backing paper that may make the above method of application more challenging, swap it out for a sheet of parchment paper for easier handling. Simply peel the transfer off of its original backing, place it down on top of a sheet of parchment paper, smooth everything down with your scraper tool, and then trim to size.
Continue the remainder of the application process as before – you can either trim off the initial 1-2″ of backing paper or simply fold back the edge of the parchment paper as shown above.
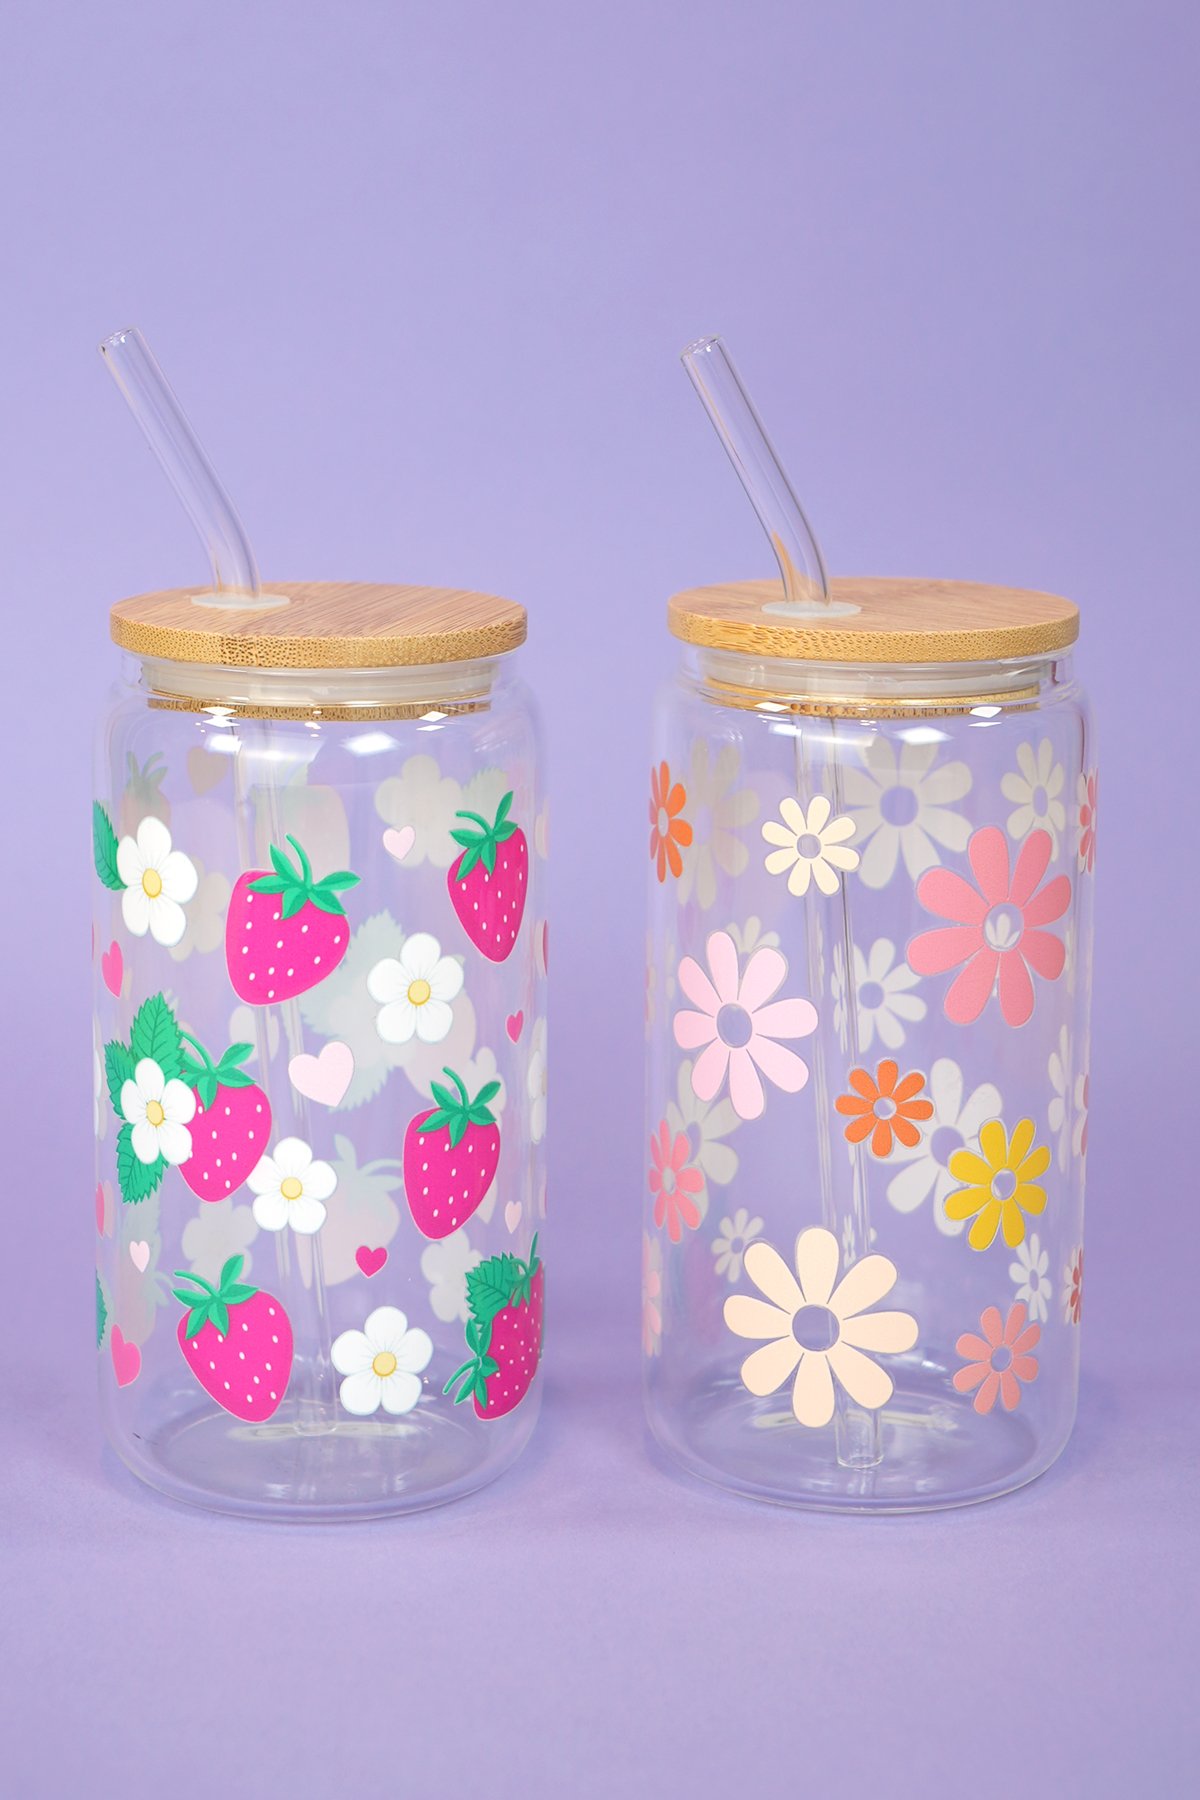
The designs and patterns on these UV DTF cup wraps have been UV-cured as part of the printing process, so the final finish is scratch proof, fade-resistant, water-resistant, and incredibly durable. (Though I always recommend hand-washing for best results!)
How to Apply Cup Wraps
What You’ll Need:
- UV DTF Cup Wrap
- Cup, Mug, or Tumbler
- Cup Cradle, optional
- Scissors
- Felt Scraper Tool
- Washi Tape
- Parchment Paper, optional
Instructions:
- Clean and prep your cup by cleaning it with a lint-free cloth.
- Wrap the transfer (with the backing still on!) around the cup to determine the proper placement.
- Add two strips of washi tape in the middle of the transfer to hold it in place.
- Peel away about an inch or two of the backing, and use your scissors to cut away that section of the backing.
- Using the washi tape in the center like a hinge, carefully lay down the exposed section of the cup wrap, and use your fingers to press and smooth the design onto the cup.
- Remove the washi tape pieces. Slowly peel back the backing to expose more of the cup wrap, and use your fingers to smooth down the design and adhere it to the cup as you go along.
- Use the felt end of a scraper tool to gently burnish the design and make sure that it is firmly adhered to your drinkware with no air bubbles trapped underneath.
- Carefully peel off the transfer tape layer. If any of the UV DTF design starts to lift up along with the plastic, gently place it back down and burnish it again with the scraper before slowly attempting to remove the plastic again.
More DIY Cups & Drinkware
- Custom Glitter Tumblers – make your own glitter wine glasses, coffee cups, and more!
- Sublimated Tumblers with the HTVRONT Auto Tumbler Press – Make tumblers and mugs quickly and easily!
- Peekaboo Wine Glasses – Learn how to make glitter wine glasses with a peek-a-boo surprise inside!

Heidi Kundin has captivated the hearts of millions with her colorful and inspiring approach to crafting, celebrations, and family fun. With over 15 years of experience, Happiness is Homemade has become a must-visit destination for those seeking quick and easy creative ideas and last-minute solutions. Heidi’s warm personality shines through her posts, inviting readers to join her on a creative journey that’s fun, rewarding, and achievable. Heidi is also the author of Homemade Bath Bombs & More and DIY Tie-Dye.